After I finish an excellent videogame, I can't help but consoom internet content about it.
For Blasphemous, I stumbled into this
and I got so hyped that I wanted to make a review for Blasphemous.
What hyped me in the video was the music, just divine. But the animations were "off"; Even though the animations were great, the color palette was too bright, and did not reflect the grimdark of Blasphemous. Cartoony artstyle contrasts Blasphemous!
This got me thinking...
Can a single filter add "artstyle" to an animation?
I will let the images answer for you.
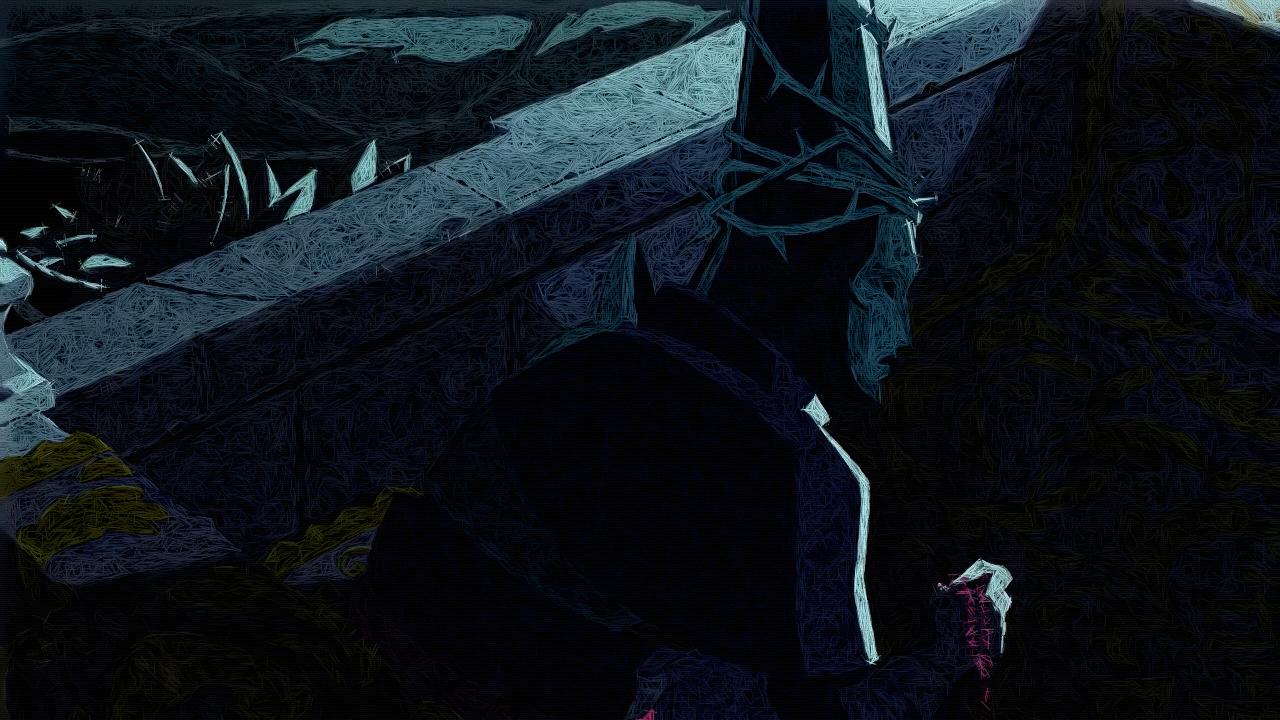
Cartoon Protagonist
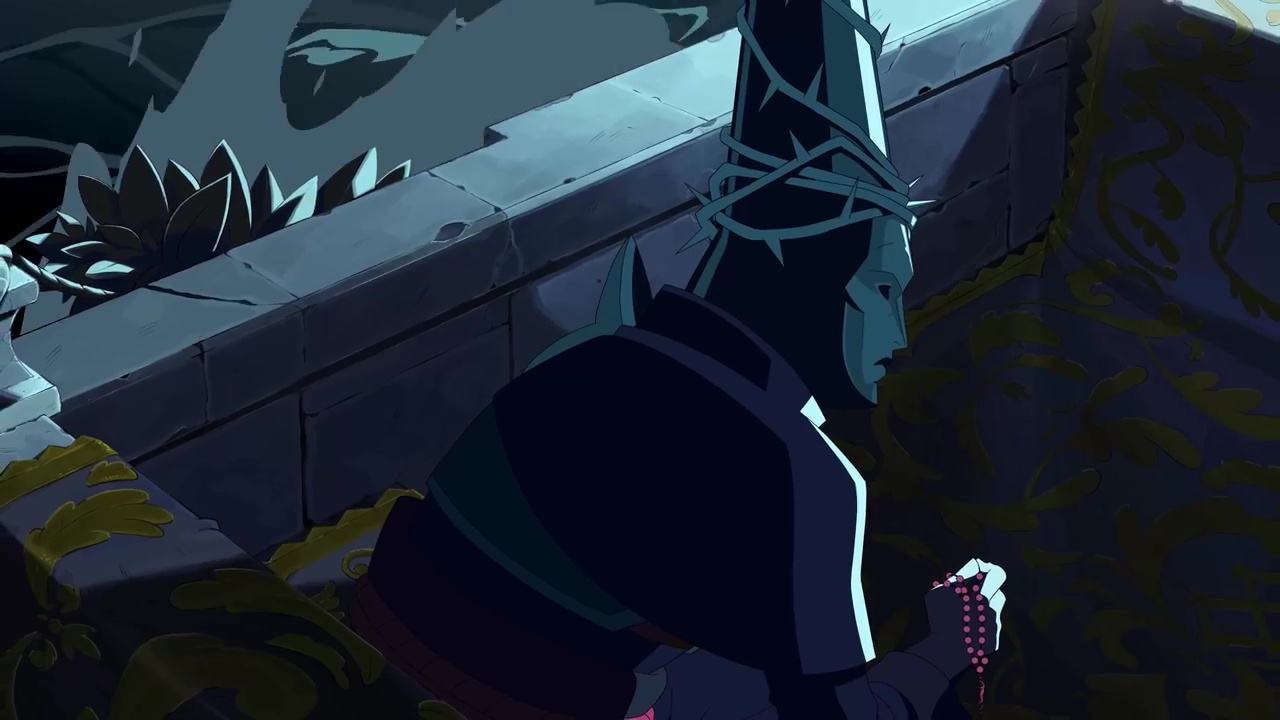
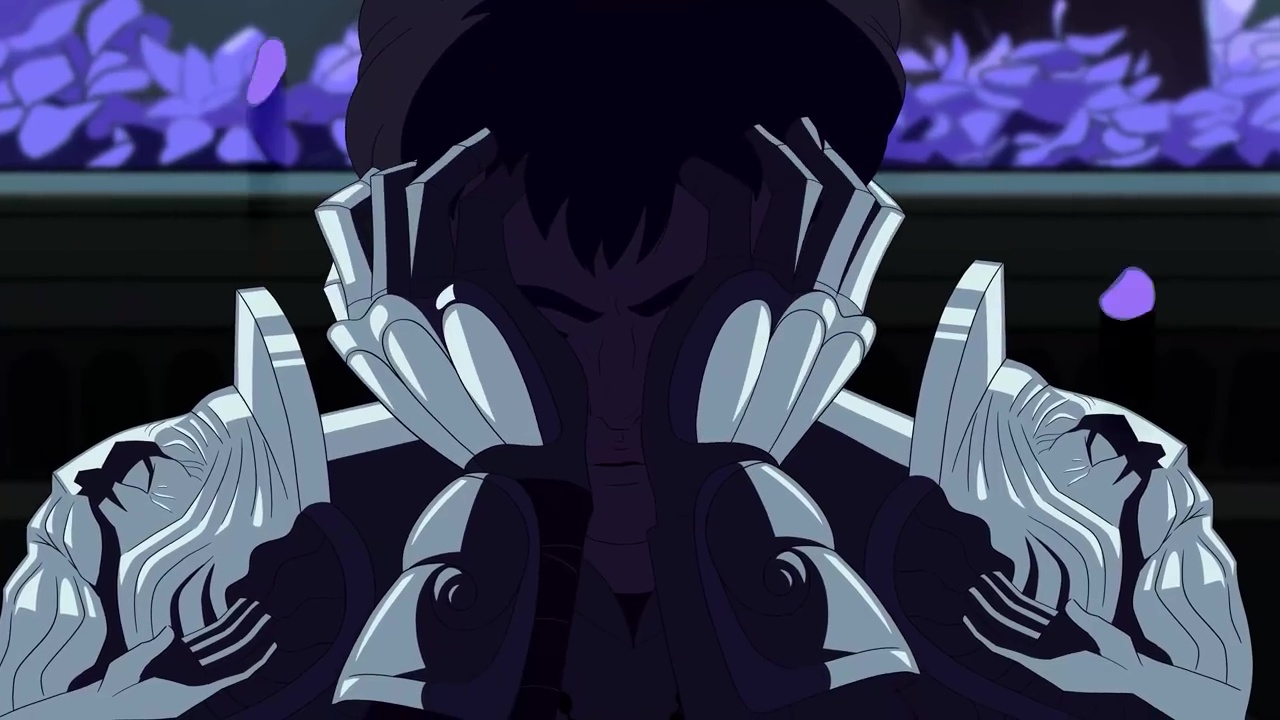
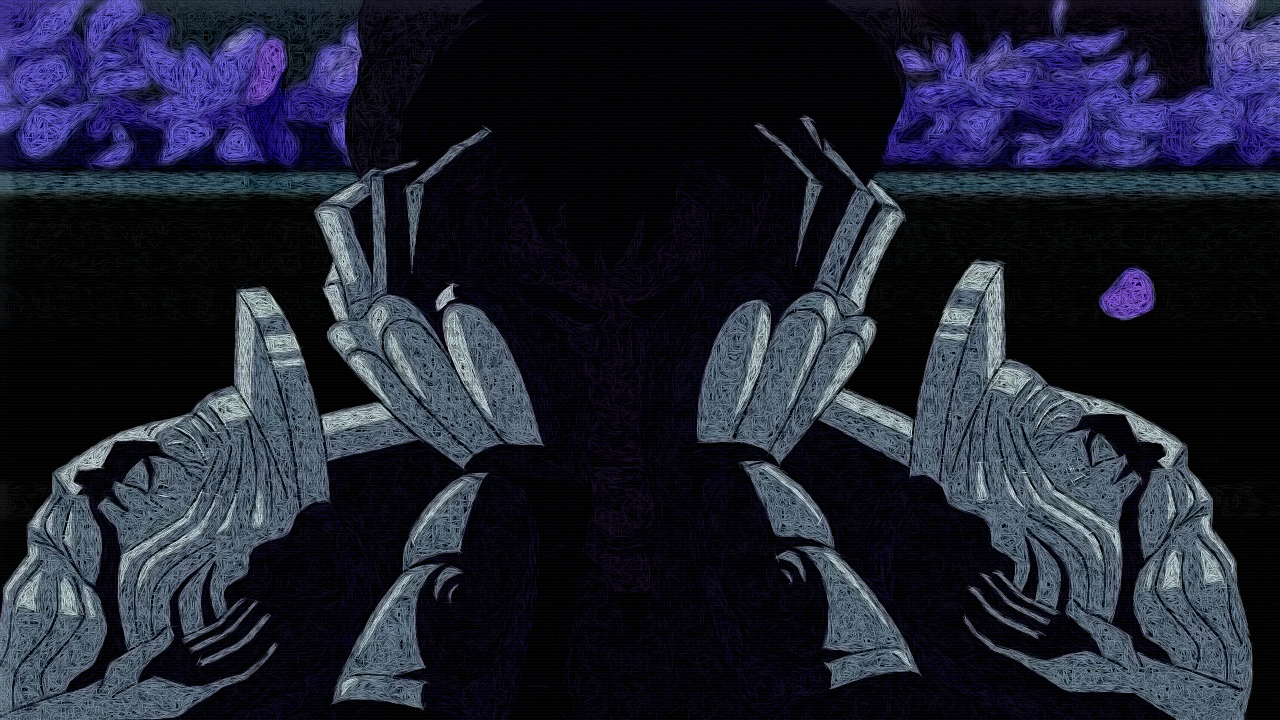
Mysterious Dark Protagonist

Favourite Morning Cartoon
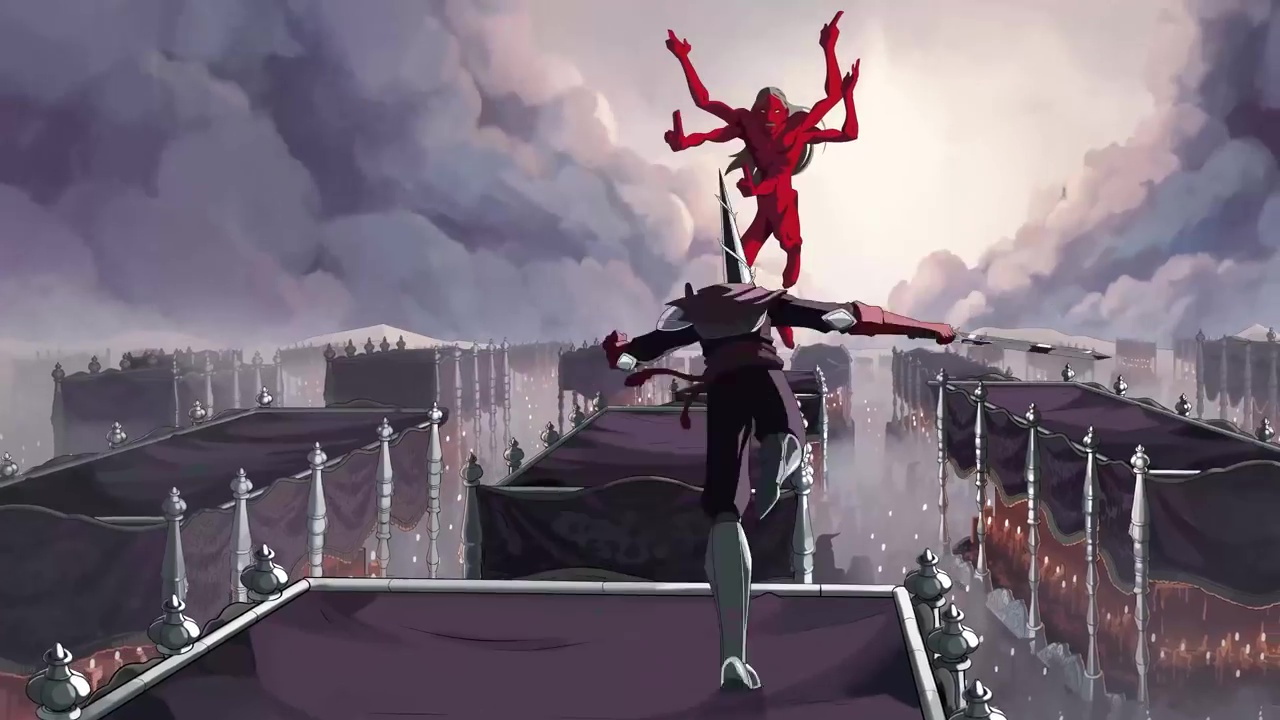
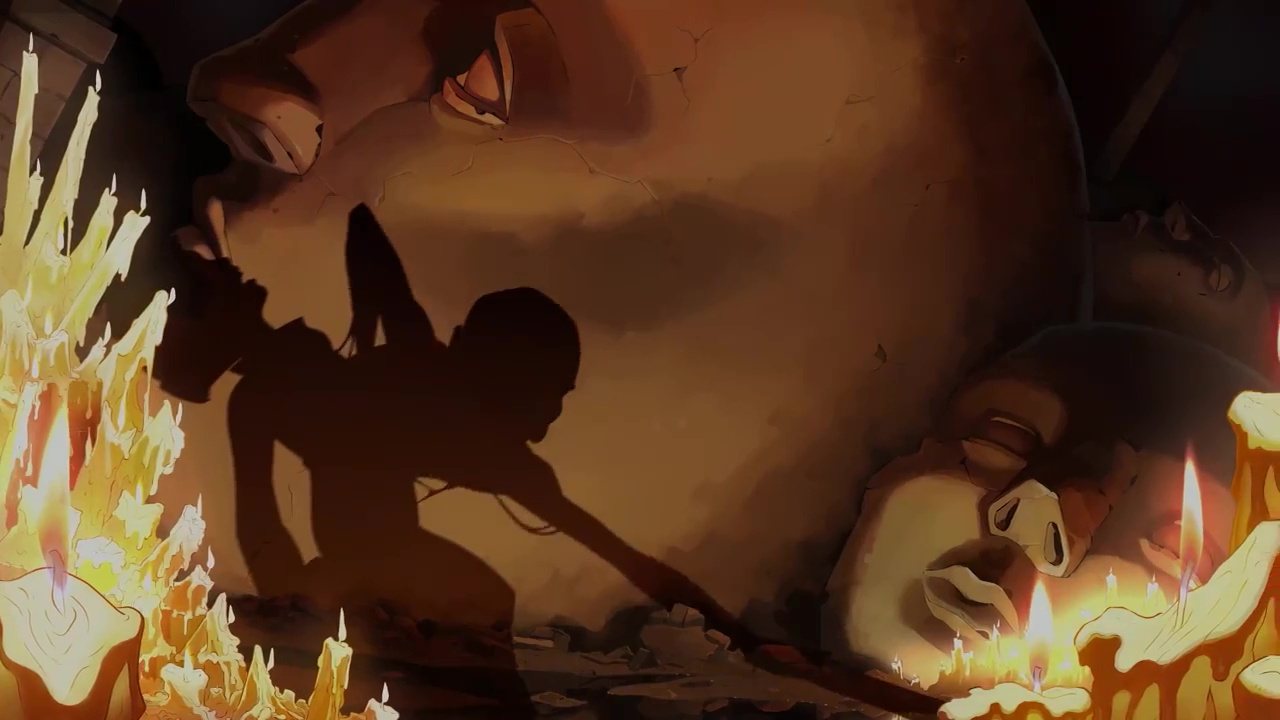
Hunting The Demon
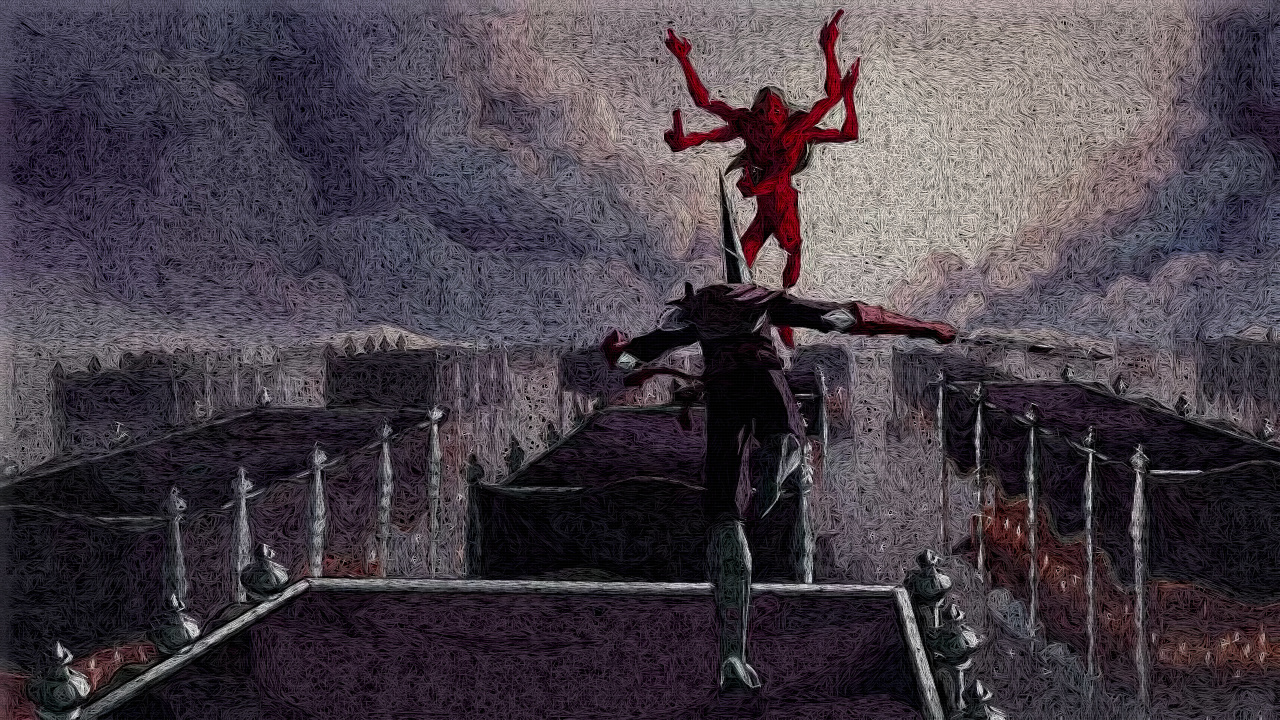
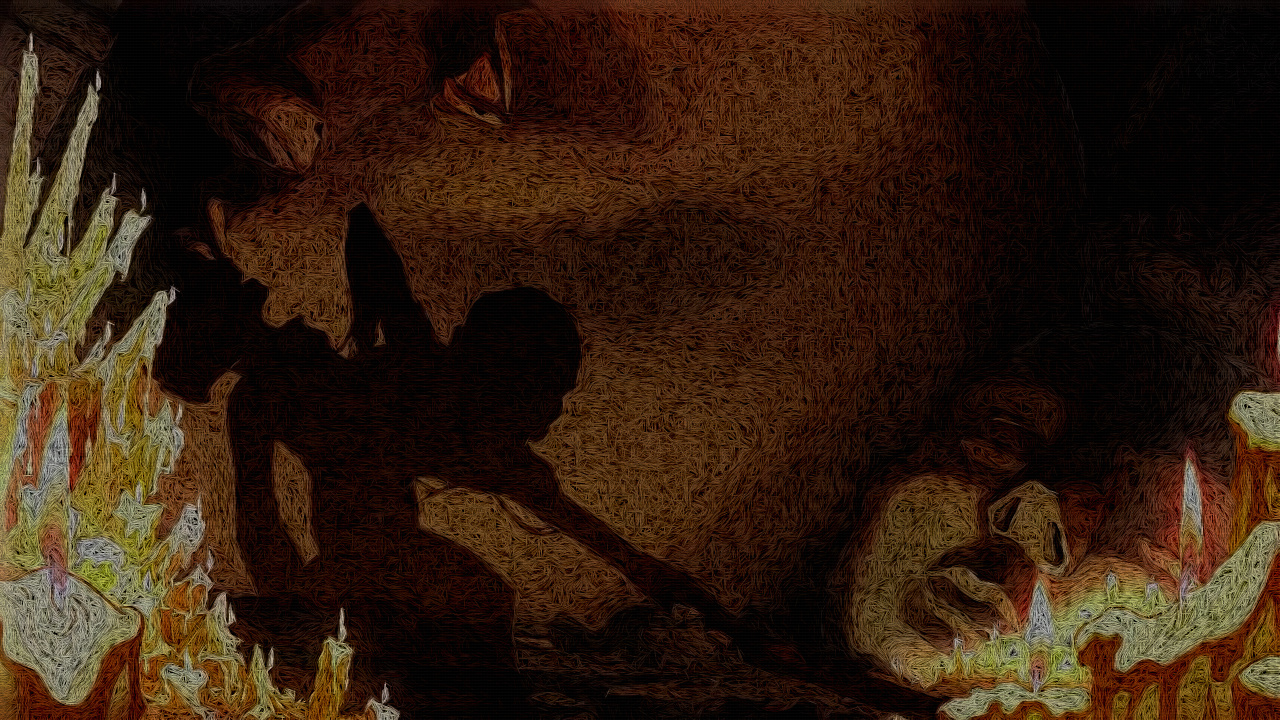
Ambient Light Spam
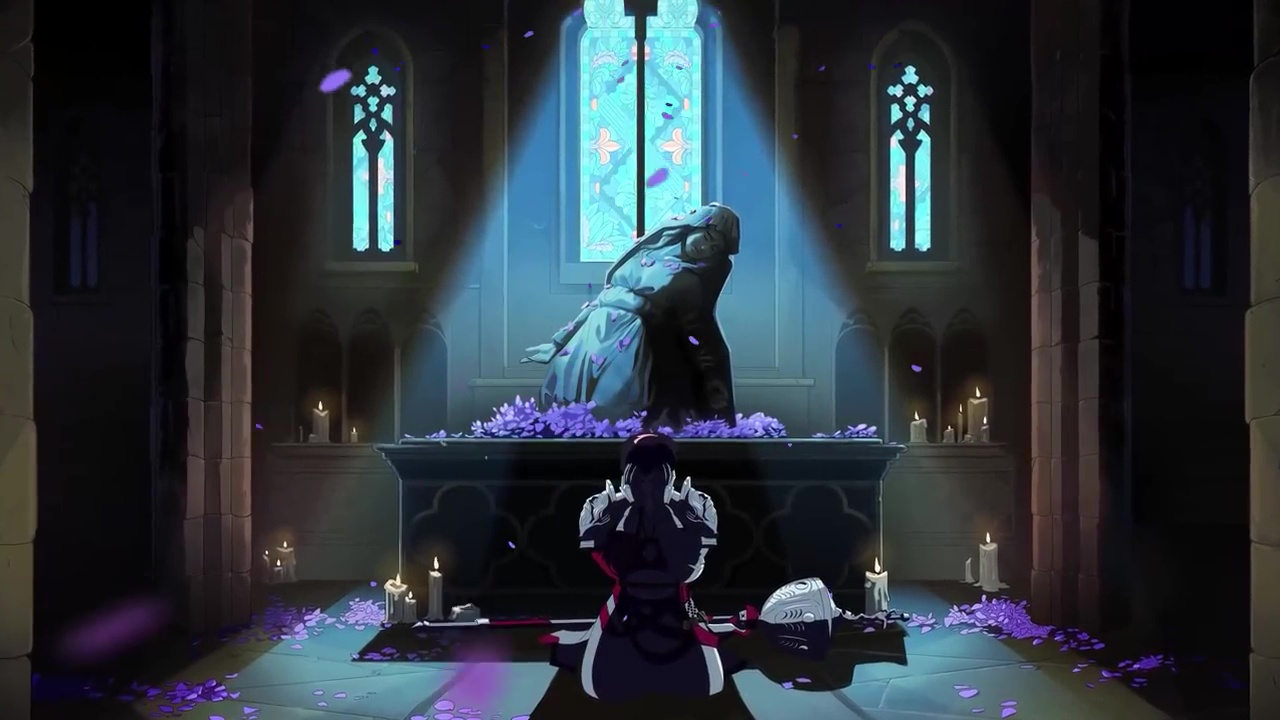
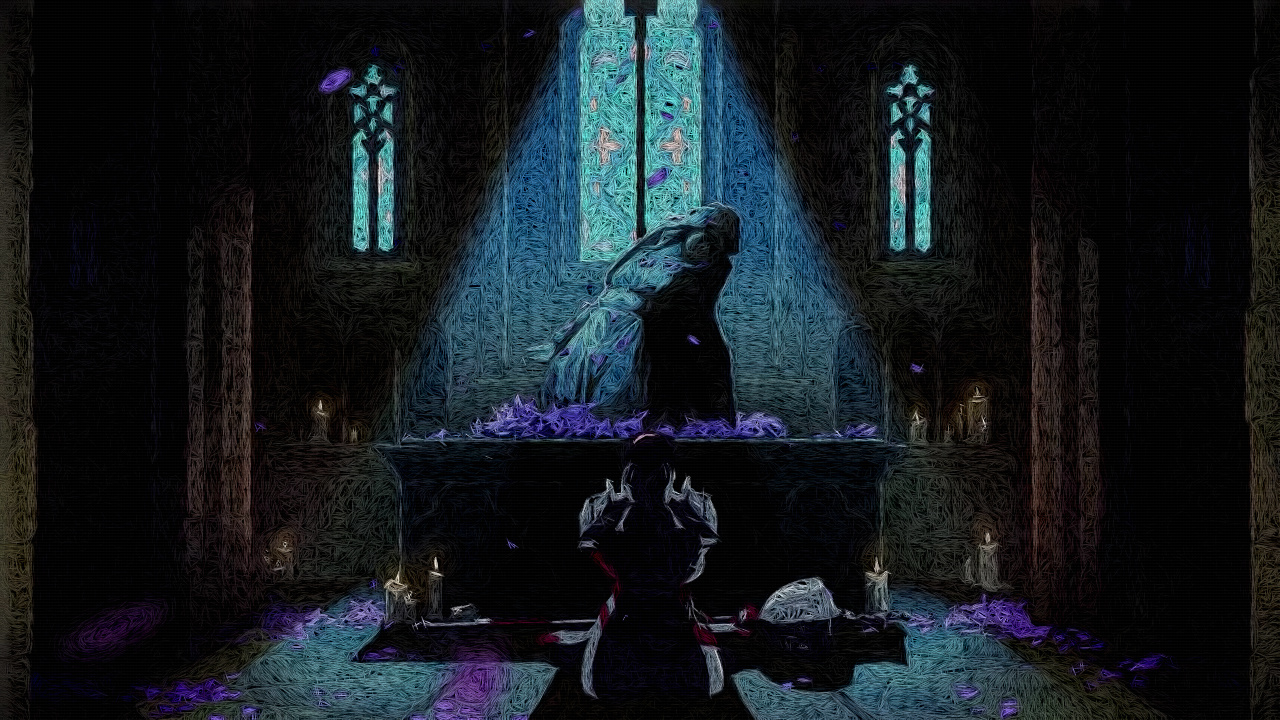
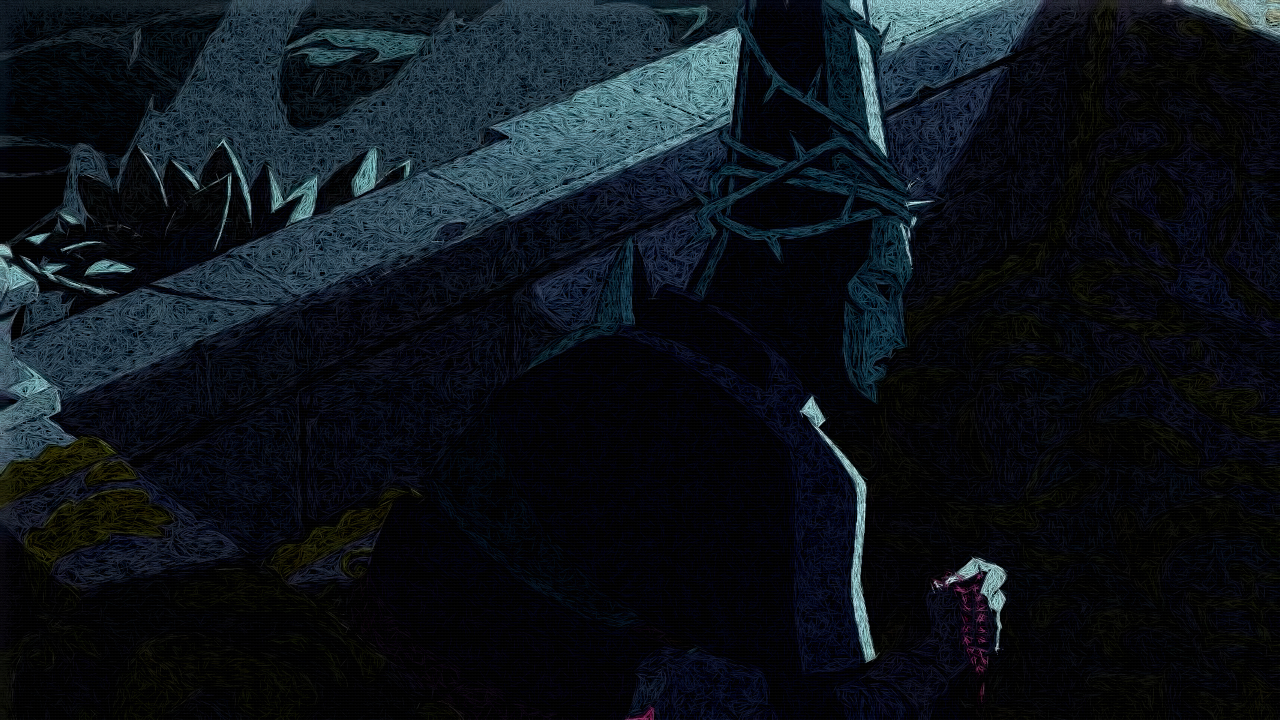
Grim Hope
What filter is that^?
Doesn't matter, you can make other filters yourself, I'm sure GIMP isn't alone in this capability. Though for every image here, I did use GIMP. Before I share the full GIMP workflow to filtering a video, I want to share my journey and experiments. Because before I got the desire to learn if I can "simply fix" a video's artstyle, I had 0 knowledge of anything you will read below, not even of image processing. Never used GIMPressionist, BIMP, nor did I ever dare to touch GIMP's source code. And I'm sure some of what you will read will be helpful.
GIMPressionist
In the Filters -> Artistic, down there in the bottom is a deprecated plugin: GIMPressionist. For context, GIMPressionist could be simplified to "Neural AI Style before it was cool". For example, take this image, and style it with a canvas texture.
Tri-Depth Crisanta
Multi-Depth Crisanta
The above^ was the very first GIMPressionist filter which made me convinced that a filter can lead to a better image than the default. I ended up on the above filter after tweaking values and (default) textures for like 2 full hours. The original animation has only 3 light levels (see "Tri-Depth Crisanta" above), but this filter creates more light levels, and also lowers the brightness. The canvas texture, even makes sense because paintings like this did exist in spanish churches.
Let's make a filtered video!
A video is made of many images. So first, you must extract/export every single image from a video. ffmpeg does the job, as usual. You now have a folder full of images. Save the filter values, and apply the filter to all the images. Obviously, you want every image filtered, and it would be retarded to do this manually. BIMP exists, where you can set macros/operations to do on a batch of images (aka that entire folder)
This should take a while, but eventually you should have a folder full of filtered images. You now gotta stitch them into a video. ffmpeg does the job again. Here is the result:
DOUBLE FAIL^
- Flicker is painful to the eye, like old television static artifacts.
- No audio, as we only batched images, so there is no audio stream!
Let's extract the audio stream of the original video, and add it onto our filtered video
Audio Desync^
Remember when we stiched the images? Obviously when you stitch a video with the goal of simply filtering each frame, you want each filtered frame to be at the exact same timestamp as the original frame.
So, if a video is 30 fps, you just place each image 30 frames apart, right?
Wrong.
Welcome to the world of animations. Where you may stretch an image for a few more frames; Not every frame is created equal.
So, to stitch the frames back together at the exact timestamp, you must also export/extract each original frame and record its timestamp. I do not know how to do either in ffmpeg (is it even possible?)
But like every problem, there is never 1 solution. I just opened the video in Sony Vegas, and stretched it a bit to match the big sound cues. Not frame-perfect, but no one should notice the minor desync.
This is the result:
Trash Visuals^
Literally worse than the original. So, certain static frames may look better filtered, but other frames in motion look worse. What cannot be overlooked is the (rectangular) flickering, literally painful to watch.
This is where I got back to testing filters, trying to find some set of values which have consistency between frames. Like textures where the ending and beginning is identical, instead of clipping. This is where I pretty much found the values for the original filtered images at the top of this post. Let me post some more eyecandy, as the final filter was applied to Esdras.
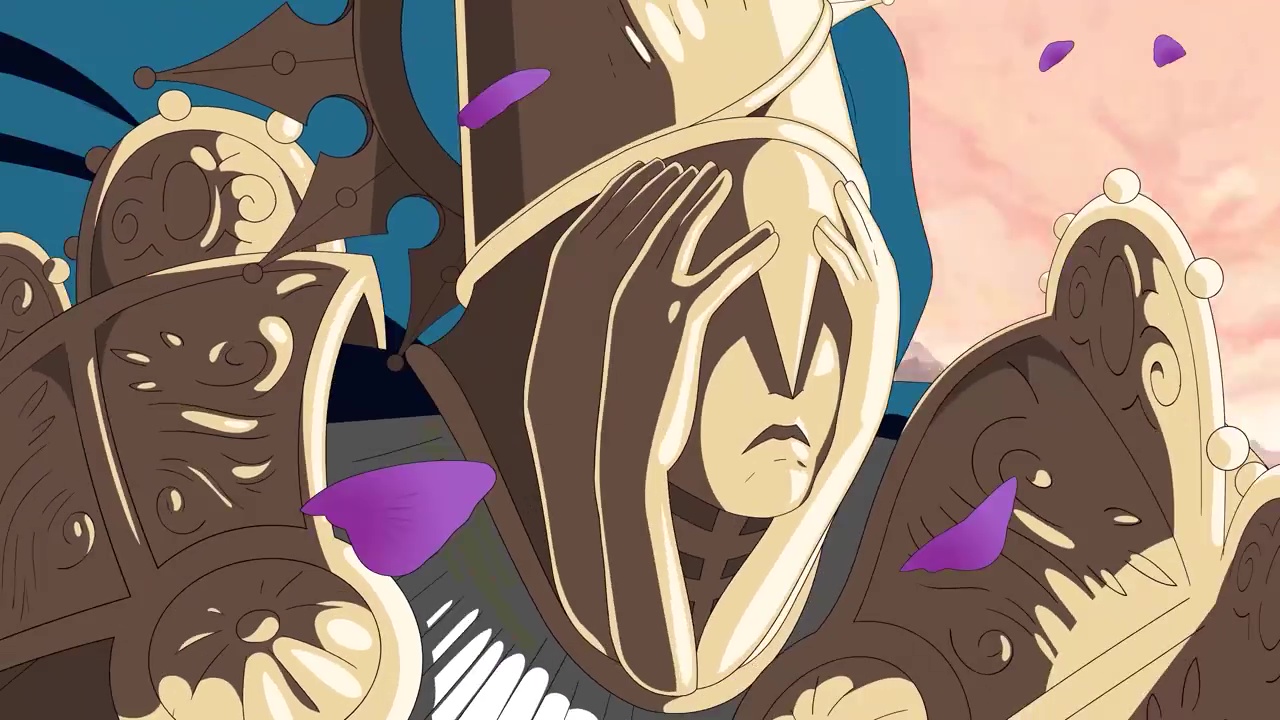
Default Esdras (generic cartoon face)
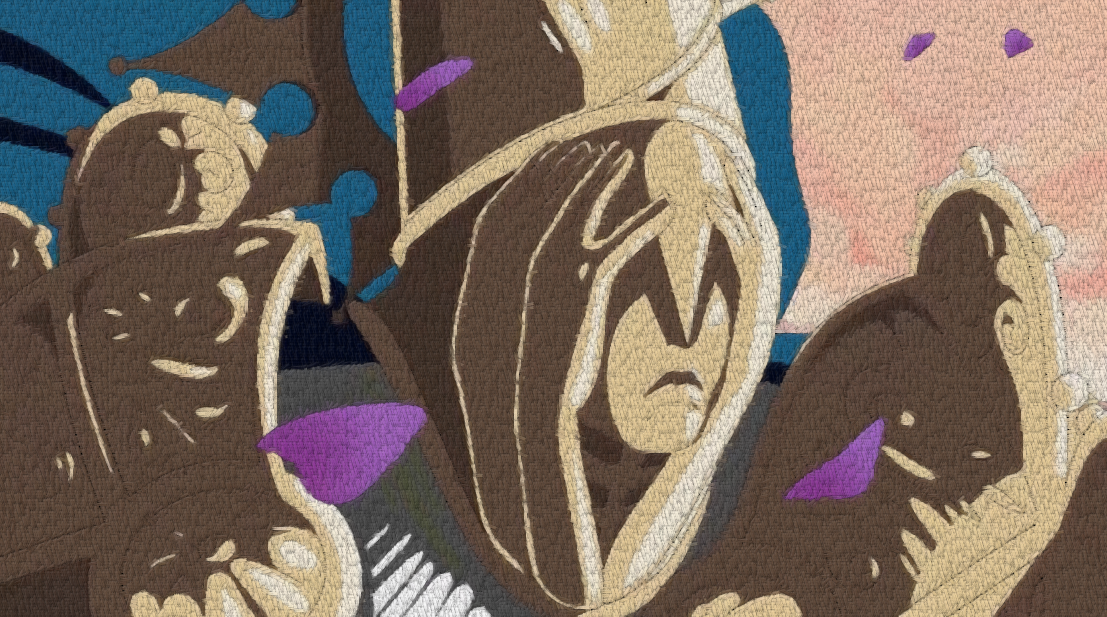
FilterTest Esdras

FilterTest Esdras + DropShadow
"FilterTest + DropShadow" ended up being the final filter which I will call Darkflow. Note that the DropShadow does all the difference, but to apply that is very performance-heavy. It makes a single filter take 30 seconds on my machine! Regardless, it's too good to ignore, just see the images at the top of this post. Or simply the eyecandy below.
Cartoon Villain
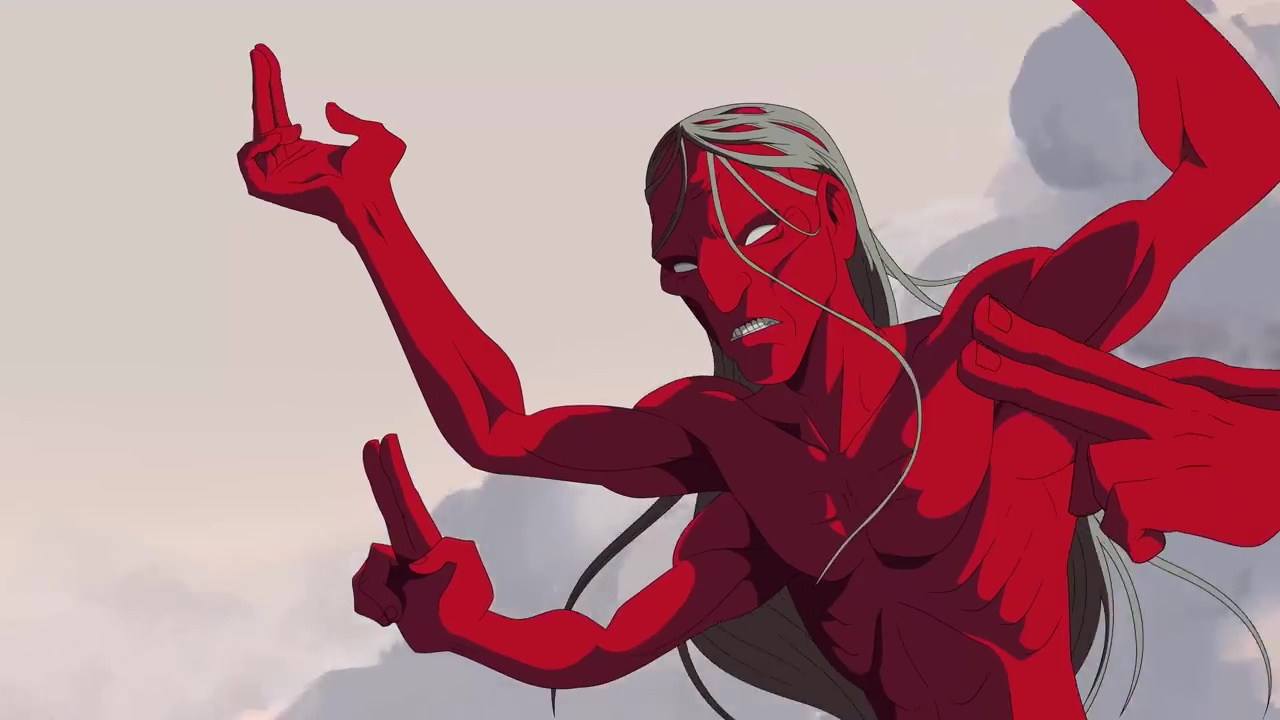
Red Demon
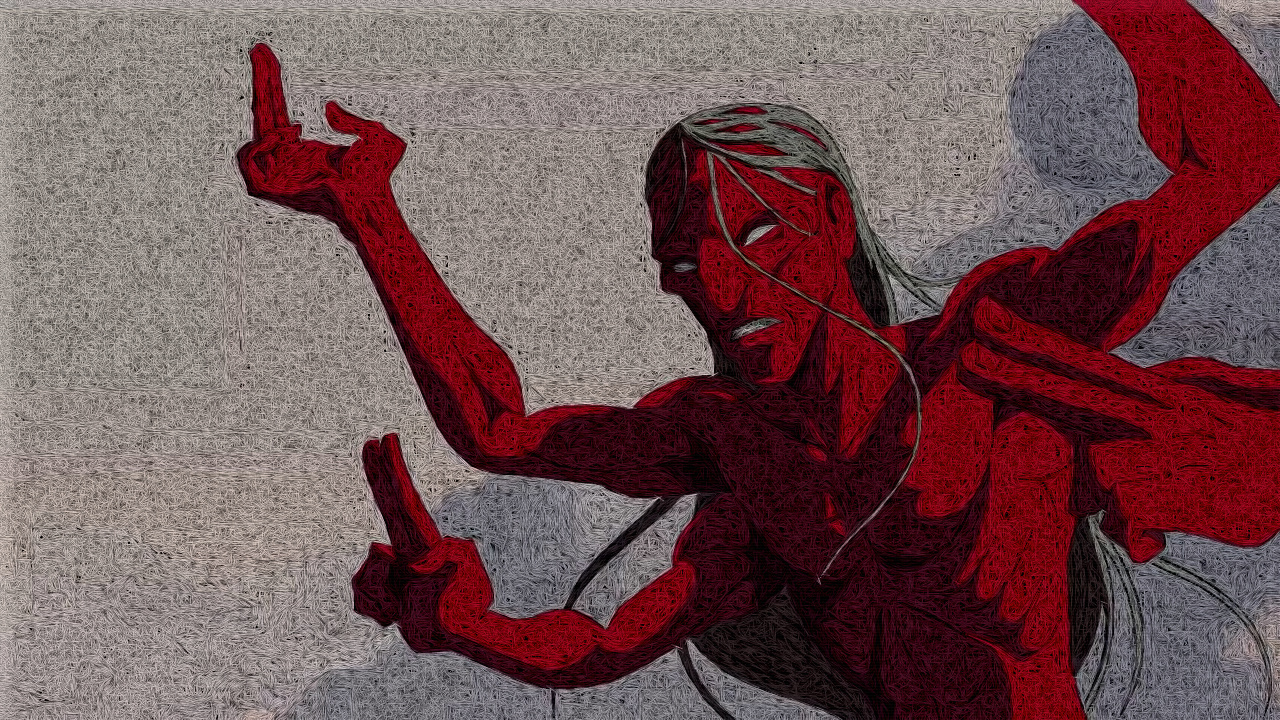
This image is already excellent (except the stone heads on the back are a bit too bright)
Darker stoneheads and candles poggers
Dark Snake

Slightly Darker Snake

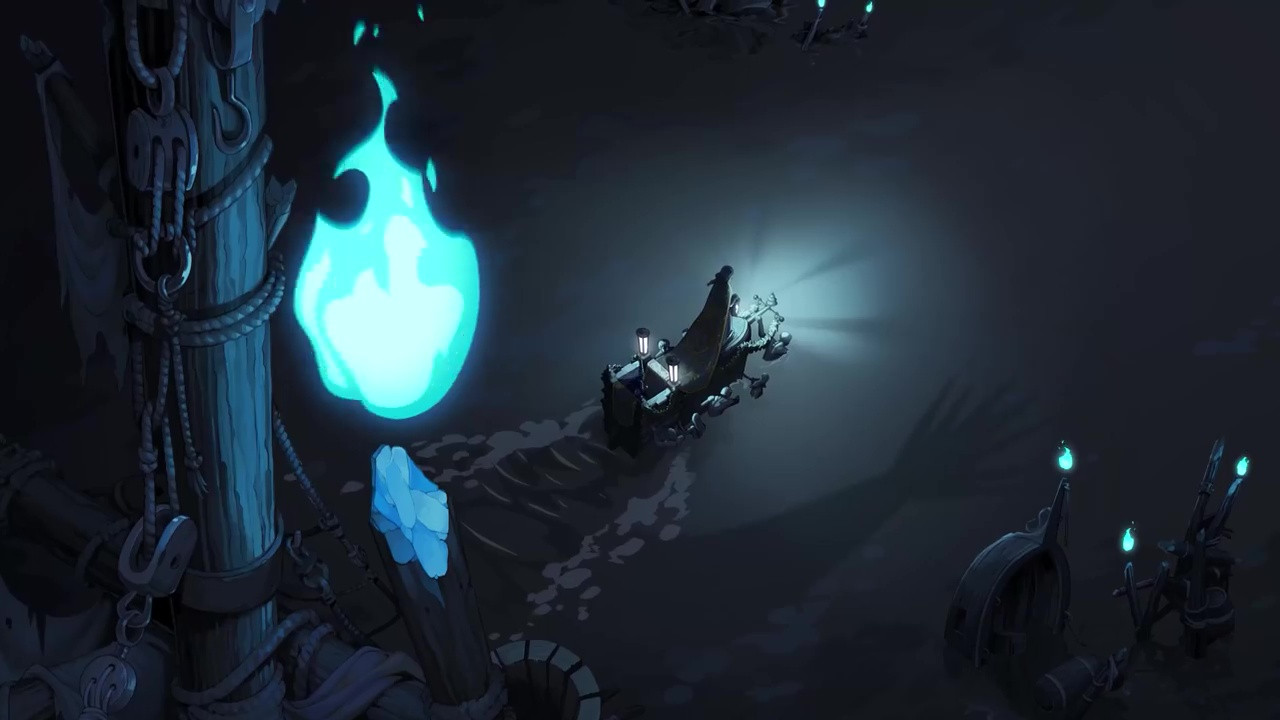
Mudwater Boat
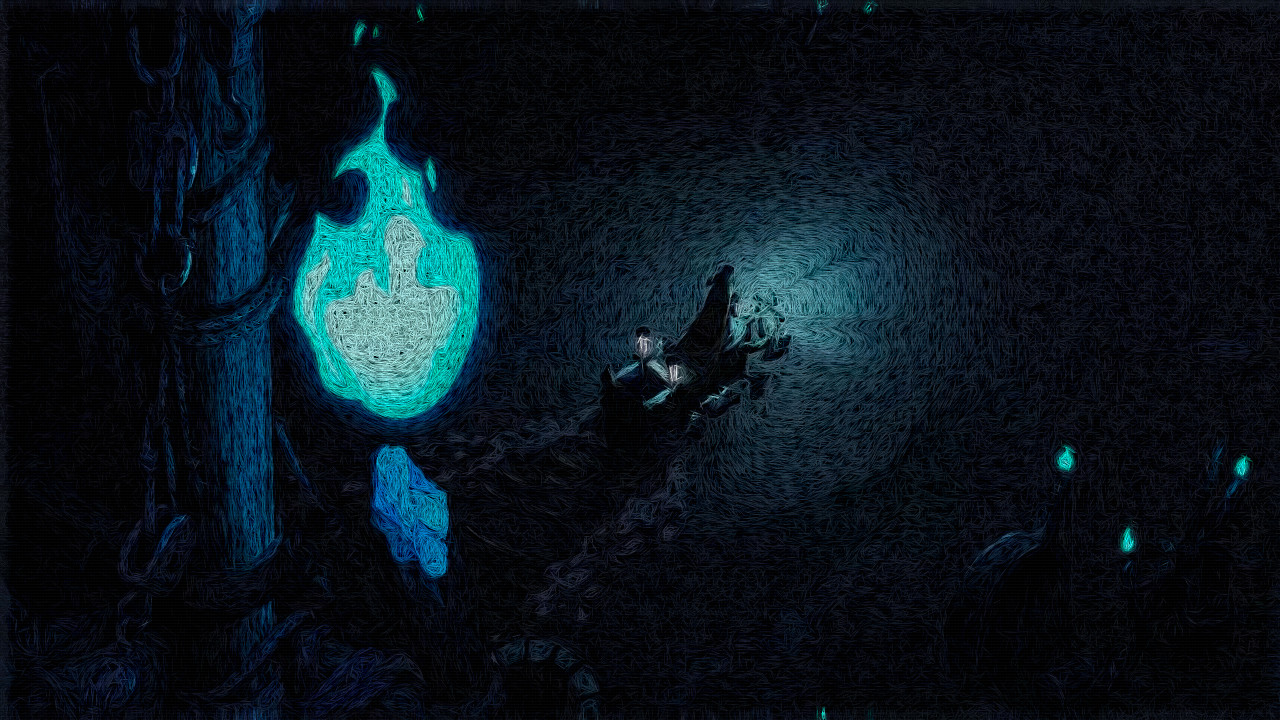
Grimlight Boat
and let me post variants of my favourite frame:
Mysterious Dark Protagonist 2
Mysterious Dark Protagonist 3
The Filter Settings
Want to apply the filter on your images? Just copy these values into your own GIMPressionist.
Note that there are surely better filters - or more fitting to your video. While I was writing this article, I played around for 10 minutes and already found one which is slightly better than the canvas one above. Of course, you can even have 2 filters on top of each other for more possible results ;)
Also note that the Update button to the left shows false results, so never use it. Just press Apply and Ok.
Darkflow Filtered Video
Flickering makes it worse than unfiltered
And to solve it, you need to tinker with GIMPressionist's post-processing. Yes, to fix flickering, the source code must be changed. I did dive to the source code, edit, build it. I spent a full week trying to "update" GIMPressionist. I learned a lot, and there were even some interesting bugs:
It's not a bug, it's a feature
Ultimately, life happened, something else caught my attention, and then I moved into coding Double Damnation (as it wouldn't code itself to release ;)
After 8 months, I returned to Linux to make an email server, and the update broke my entire Linux beyond repair (rolling release moment -_-)
So, I lost the GIMP build script + the code changes I had done + I obviously have forgotten how GIMPressionist code works.
I got only a small .txt which has the last TODO, which I will synopsize it as:
"Use global variables and cache the random values of the first image's filter, so the exact same values are used for the rest of the images."
The filter's results are different even for the same image, as it uses a random number generator (which I couldn't hardcode to output a fixed value reeeee)
So, frame1 and frame2, with the same random output would be almost identical in filtering (as the brushes are applied adaptively, aka matching the orientation)
This theoritically would fix flickering, as the next frame of the current would be identical in its filter, except for the diff part of the image.
"Complicated, gib example plz!"
Frames 621 and 622

Now look what happens without randomness.
Look what happens when the filter is consistent, how it should look like:
Frames 621 and 622
 would exist only in moving/diff elements.")
Epilogue
I would honestly return to editing GIMPressionist's source code, if I had the old setup but it's gone! Succeeding in fixing the flickering^, would mean I can apply any filter to any video. Then I planned to open-source this "tool"/guide, so anyone could use it to improve their videos! An obvious example is for your gameplay video (youtuber or developer) where you can apply styling onto an entire video! No need to pay Neural AI servers of Google/Amazons, but just use your own machine! So, if you have knowledge of GIMP's codebase, please contact me, and I will give it another try.
Anyway, for a 1-week experiment, I learned quite much, and having ignored the boring code stuff, I have shared the most important bits to you, so I hope your reading of my tinkering was helpful to you. And at least I got those beautiful dark images, which match the greatness of one of the best metroidvanias in existence.
It's insane to think that all of this autism wouldn't have happened, if not for that Divine song in the animation at the top. Hype is one hell of a drug.